Last November, Microsoft announced a lot of new enhancements to the Microsoft Information Protection portfolio. In a short series of blogs I will explain some of these. In this blog: auto-labelling your documents in SharePoint Online and OneDrive at-rest. This is the first part of a two part blog.
Auto-classification
The term auto-classification denotes the ability of the AIP and Unified Labelling client to detect and automatically classify information based on certain criteria. This function has been around for some time, but does require the document (in this case) to be opened in a client – MS Word for example.
The client uses the auto-classification settings to determine if the content is sensitive and applies the label accordinly. Yes, this setting is part of the sensitivity label.
Issues
One of the issues with auto-classification using the client is data at rest. As stated, you need to open a document to be able to classify it. To be fair, there are means to automate this and I explained these at the Scottish Summit in 2020. You could use PowerShell to help you, for example. But let’s be fair: what end-user will use PowerShell to scan their OneDrive? Or you can use Microsoft Cloud App Security. But there was no Office 365 build-in function for this.
Auto-classification at rest
Now, in preview, we can detect and classify information in SharePoint Online and OneDrive for Business. During a webinar in January 2020 Microsoft gave a glimpse of this, so be sure to check this out. And let’s take a look….
Before going any further, one quick note on the preview. The information we have today states that this function will require an Office 365 E5 tenant. Also, a maximum of 25.000 files per day/per tenant is available. These files can be scanned by using a maximum of 10 labelling policies, with a maximum of 10 site-collections per policy.
After enrolling into the preview program, you will get access to a Microsoft Teams environment. As this is a preview, you can ask questions and provide feedback as-well. You’ll also get an e-mail with instructions on how to enable the preview. Very easy stuff and then you go to the Microsoft 365 security portal (security.microsoft.com).

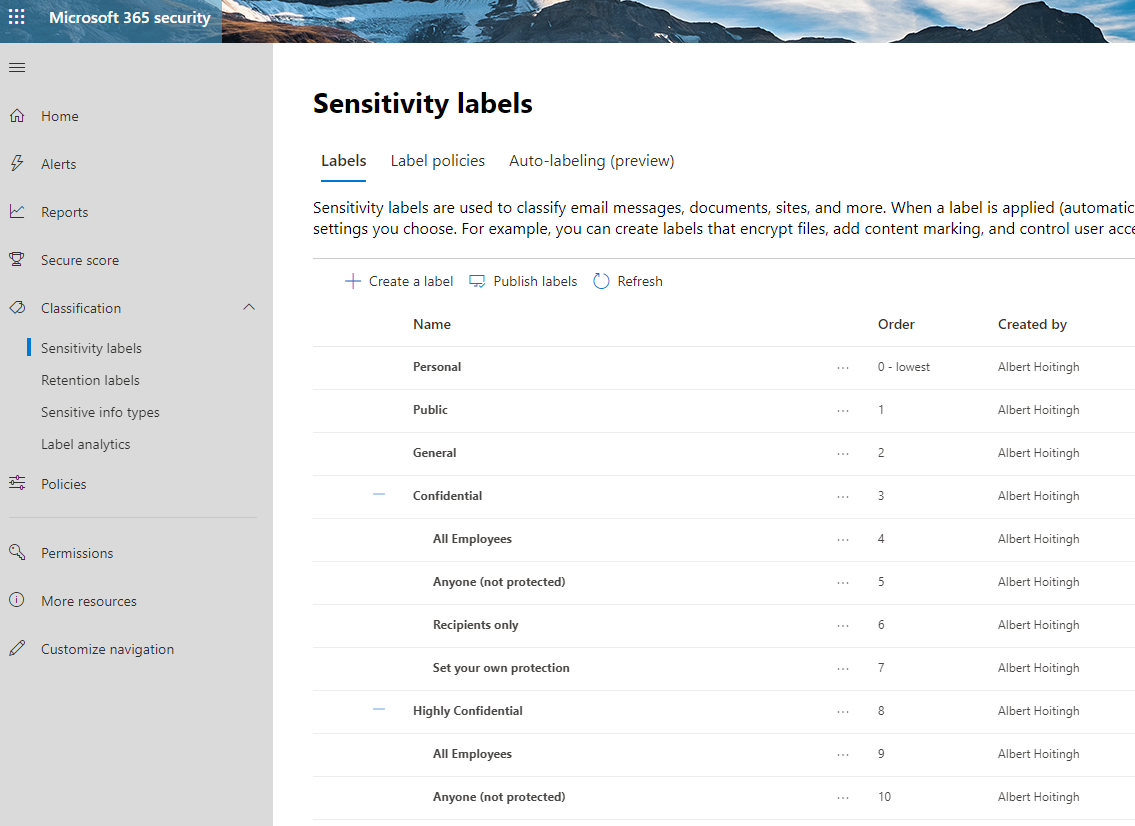
The auto-labelling function is part of the sensitivity labelling function, which itself is part of the classification part of the dashboard. When opening the dashboard you’ll see your policies, their status and the option to create a new policy.

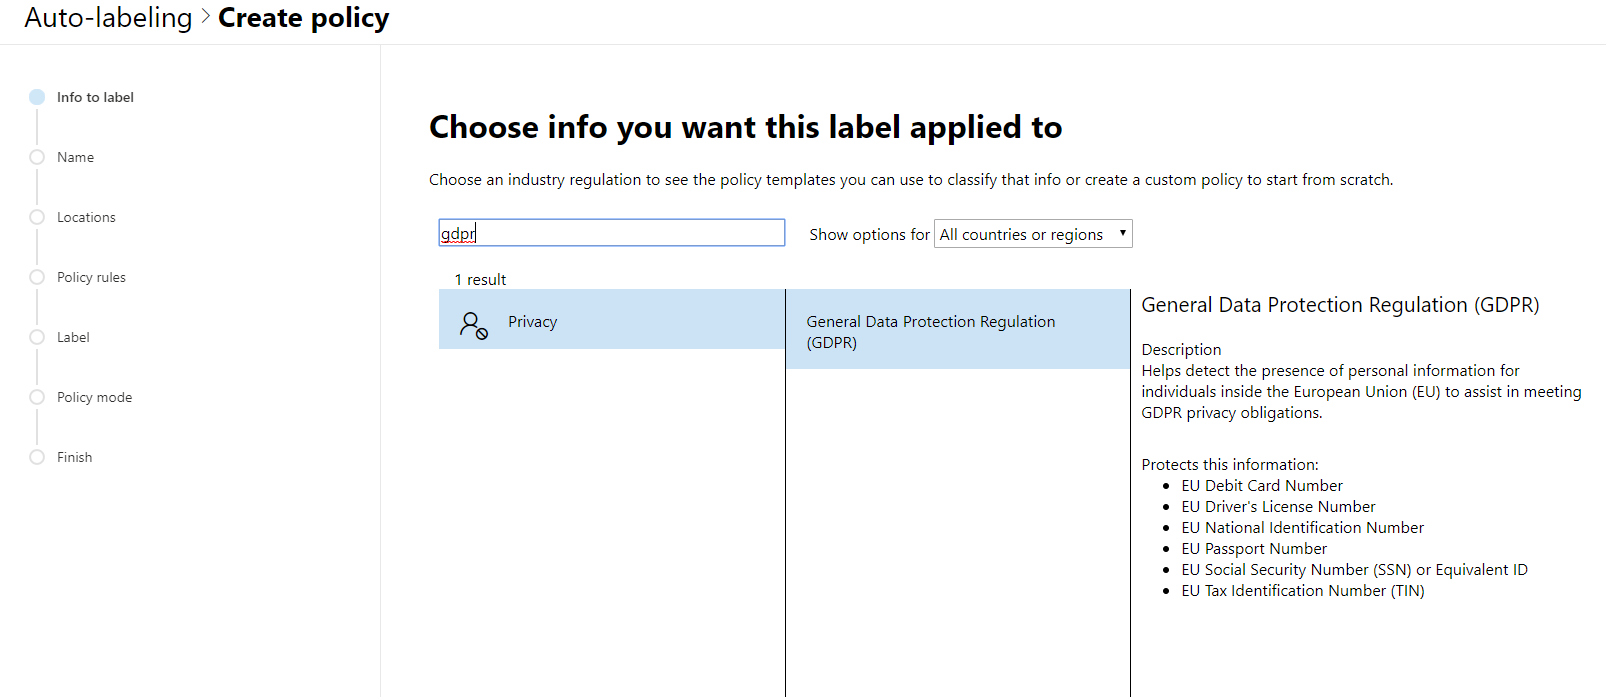
I’ll go ahead and create a policy to detect information related to the GDPR. Which translates to information like credit card numbers and passport numbers. I’ve got some Word documents which contain these in SharePoint, so let’s see.
The policy wizard is kinda-similar to the wizards for creating labels and DLP rules (more on that later). In a later part of the wizard you will be able to customise the accuracy of the sensitive information types. Be patient 🙂

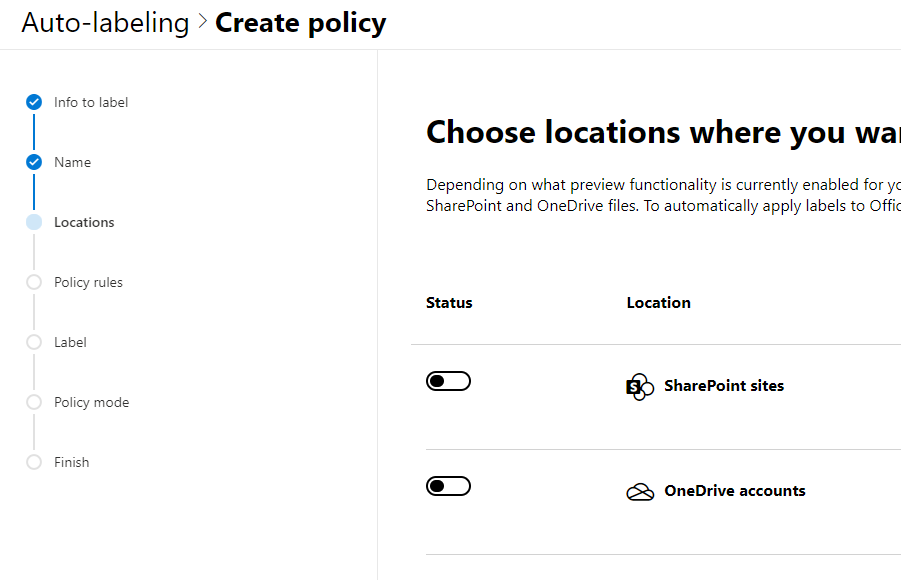
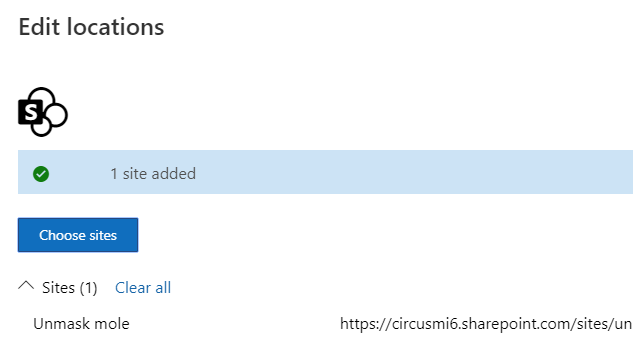
Now that we have the sensitive information to be detected and classified, let’s set one or more locations. This still needs some work. You can add SharePoint and OneDrive sites. But if you want to add specific sites, then you’ll need to copy/paste or enter the entire URL in the search bar.

I choose my “default” demo site. I know that this site has some documents with credit card information in it. So, these must be effected by this policy.

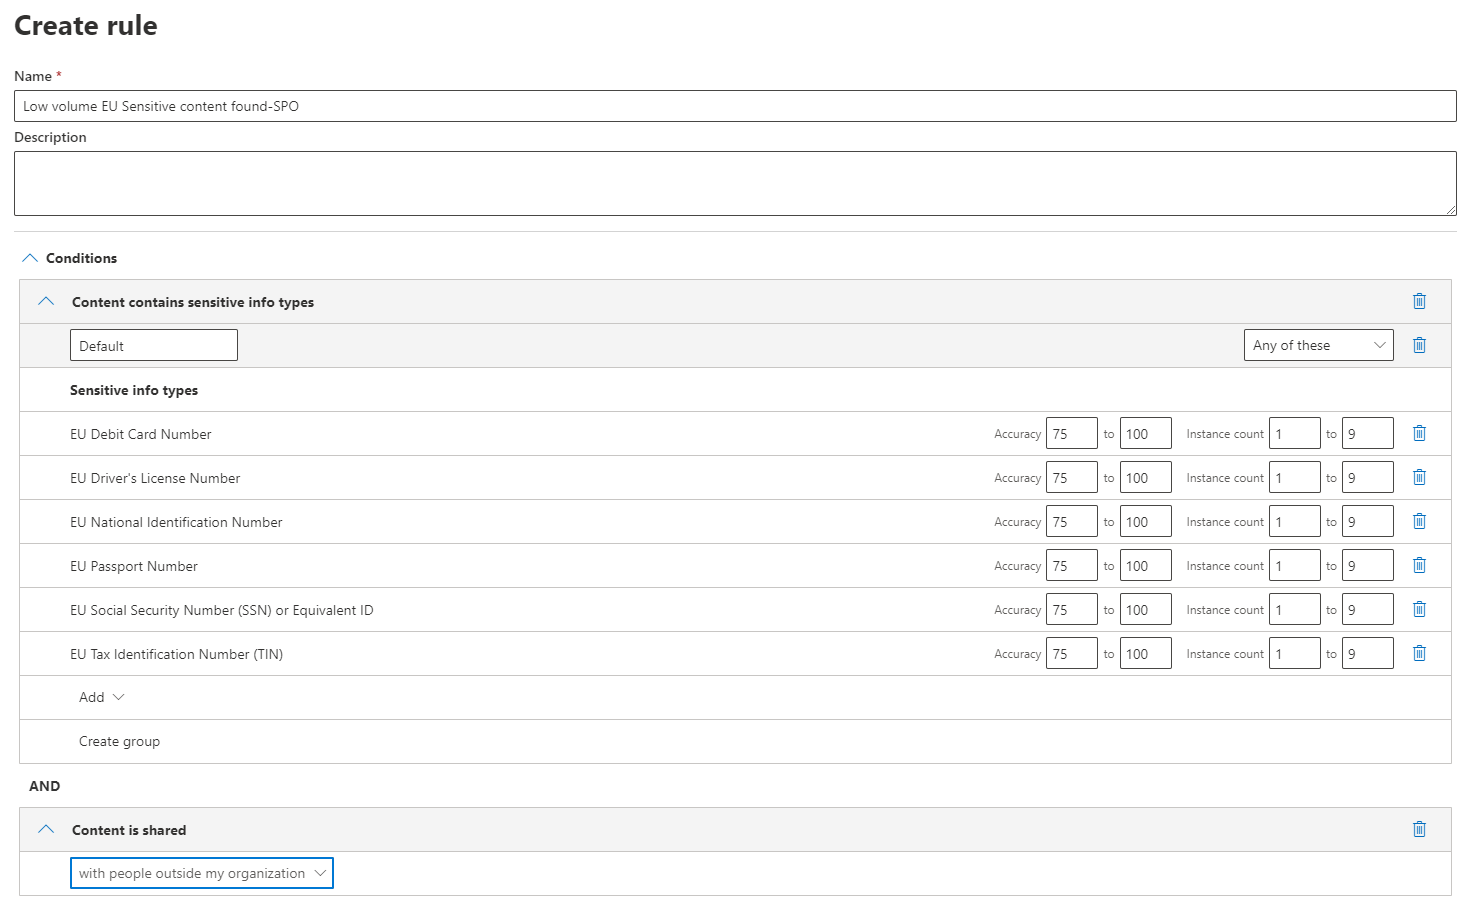
Next is the sensitive information to detect. As I’ve selected the GDPR template earlier, I now get to fine tune the sensitive information types contained in this set. For this I get on overview of the sensitive types, their accuracy and the minimum/maximum number of occurrences. These are very similar to the settings in a DLP policy. Btw: you will need the “Advanced mode” to access these settings.
If I don’t need one of the types included, I can simply delete that one. I can also modify any of the settings. Just with the DLP rules, I can have a “small scale” and “large scale” part of the policy. Handy if I only want to classify a document which contains a certain amount of sensitive information.
One thing I’m not sure about is the “Content is shared” bit. This is classic DLP, but does it make sense to have it in here? It’s a standard part of the policy, but I deleted it for this demo.

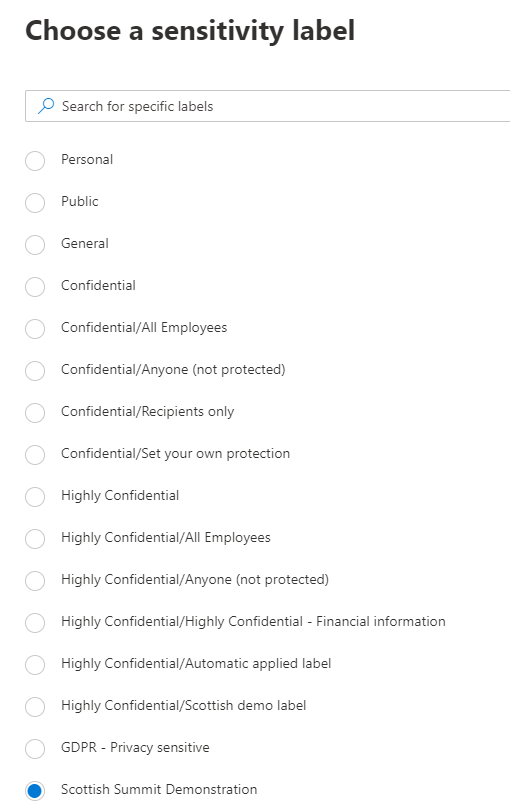
The last thing to do it to select the label. All the sensitivity labels are here.

![]()
Test mode
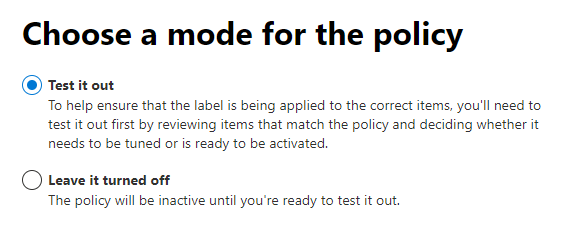
Now that the policy is finished, you might want to start using it. But there’s a simple safety net put into place to guard against mistakes and to make your policy even better. It’s the test mode.

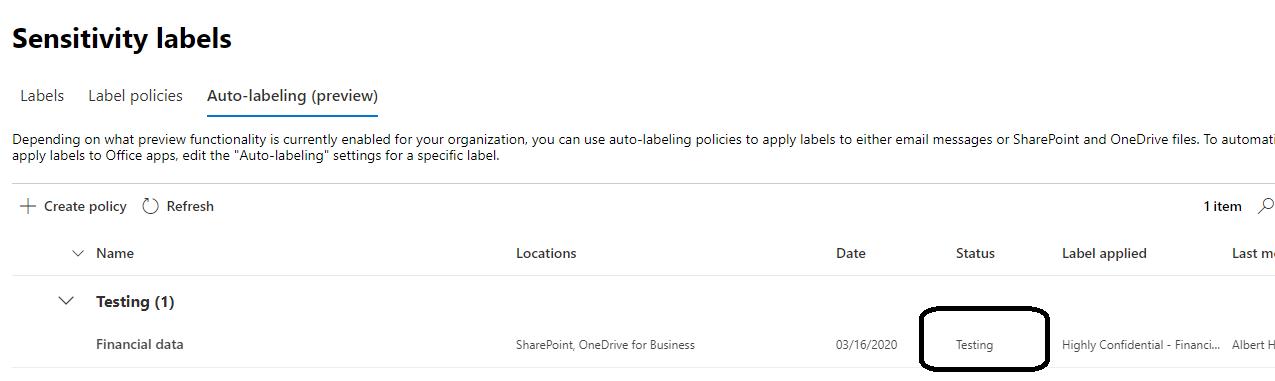
When enabled, the test mode will start detecting your sensitive information in the locations you specified. With one catch: it will not apply the label you selected. Instead, you’ll get a very nice overview of the sensitive information.
Step 1 – Testing in process

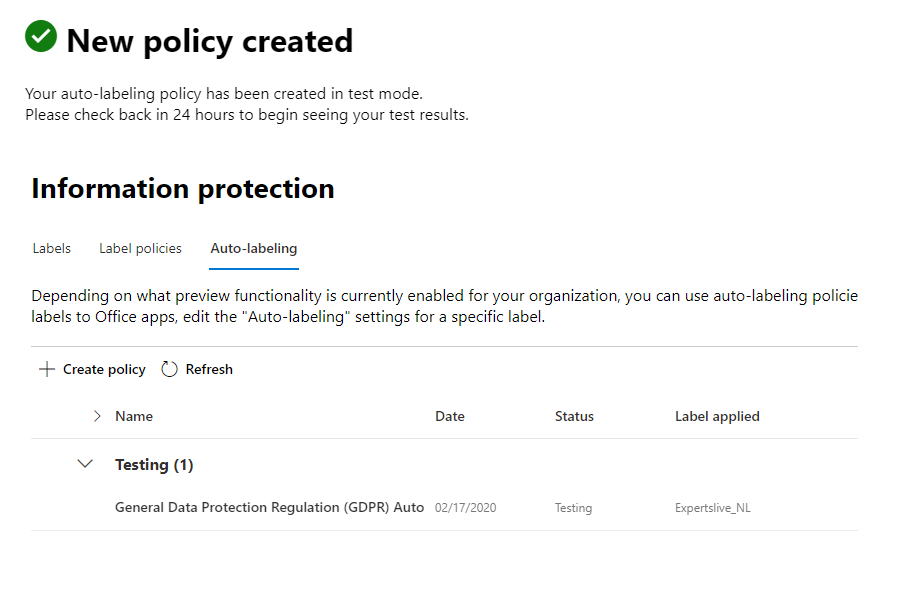
Step 2 – Testing completed – ready to turn on

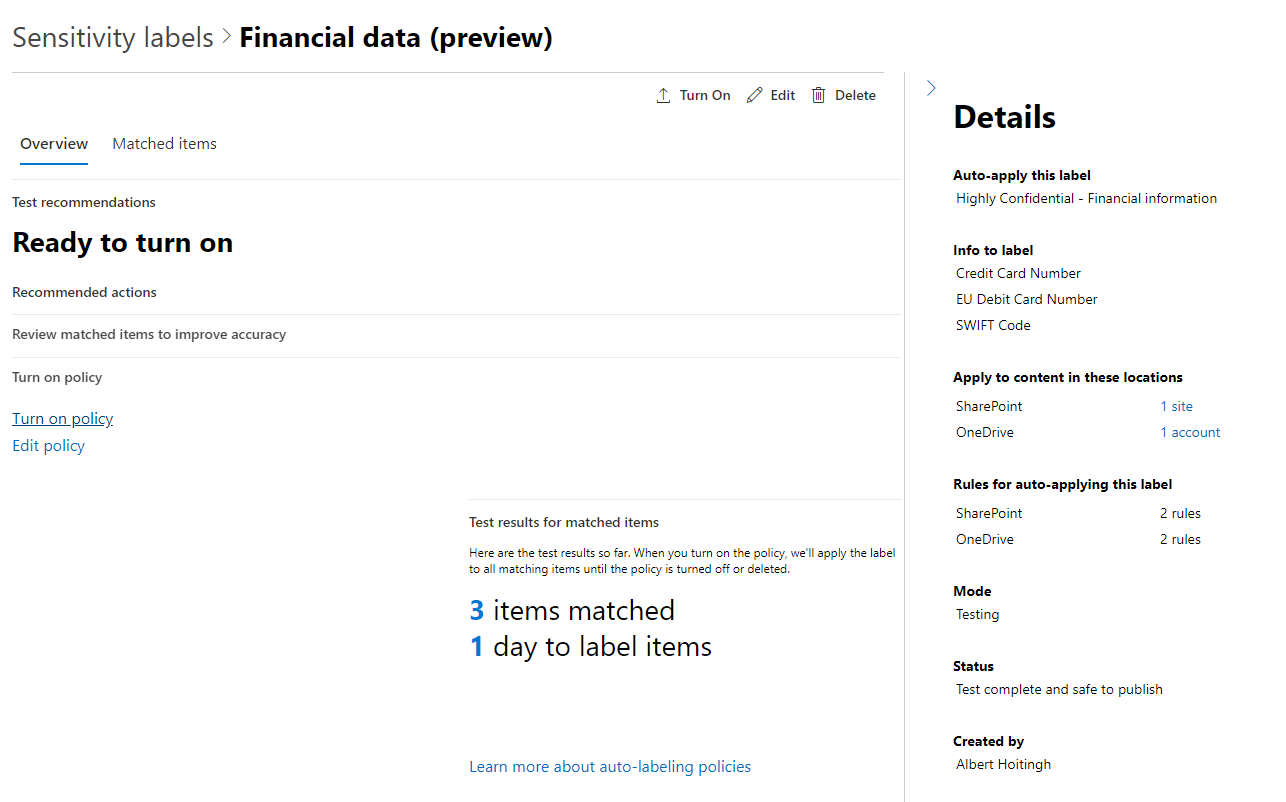
Step 3 – Testing completed – matched items detected

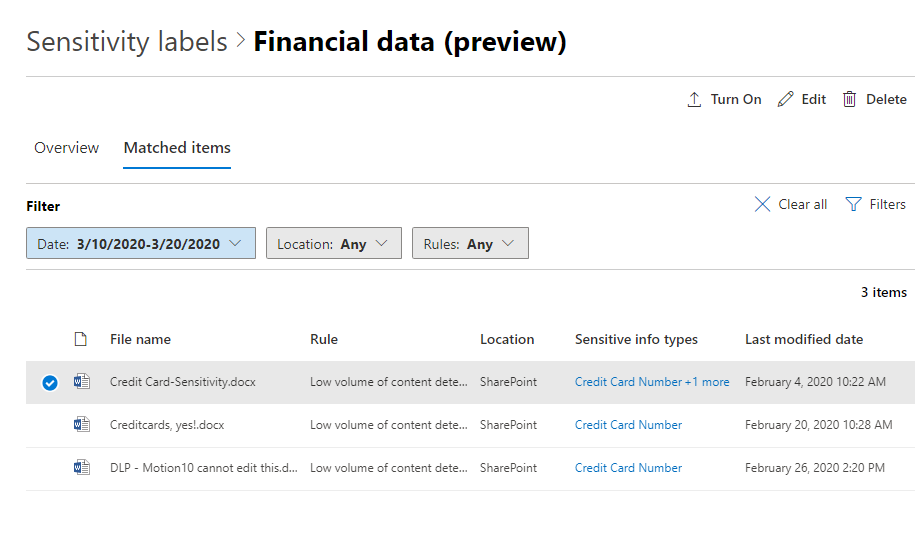
Does it work?
When your satisfied with the matches (and I am), then you can turn on the policy. So here’s go. Here’s a screenshot of the SharePoint library before the policy took effect. I have three documents. One Word document which already has a label, one Word document without a label and an Excel document with a lower label applied. All three have the same credit card information.

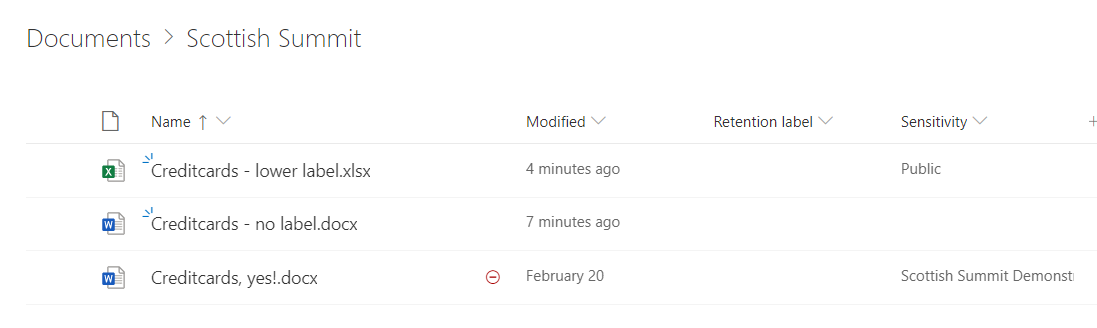
And then the results…… Well, to be honest…. I did encounter some issues here. So, say tuned for part 2 of this blog when we’ll take a look at these. For now, some take-away’s:
This is a great addition to the information protection portfolio and great to see this function added to the Office 365 facility. As this is still a preview, there’s some things to consider.
- It will take some time for the testing to complete;
- The same goes for the policy to take effect;
- There’s no logging or status when you turn the policy on *);
- You cannot select a parent label for auto-classification;
- It’s based on the sensitive information and not on the location of the information. In other words: there’s (still) no option to set a default value on libraries.
*) Fun fact. If you play around with the URL’s, you are able to see a status overview. Use this URL and replace the yourdomain and policyname attributes.
https://compliance.microsoft.com/informationprotection/policy/FFO.extest.microsoft.com~2FMicrosoft%20Exchange%20Hosted%20Organizations~2F<yourdomain>~2FConfiguration~2F<policyname>?viewid=autolabeling&entityviewid=overview&policyName=<policyname>
Let’s say your domain is “test.onmicrosoft.com” and your policy is “test policy”. Then this URL would be:
Have fun!
Can you provide more details about how long it actually took for the policy to go into affect
Hi Dean,
I will, in part 2 of the blog.
My experience at this moment: quite long. Which is odd, because the service does “find” the documents with sensitive information really quickly.
But I’ll post an update soon (I hope….)…