One of the nicest features of SharePoint which I have come across is the geo-location field. You can use this to show a location on the (Bing) map. This field is added to your SharePoint list (figure 1 below) and also, you can create a specific geolocation view (figure 2, very nice!).

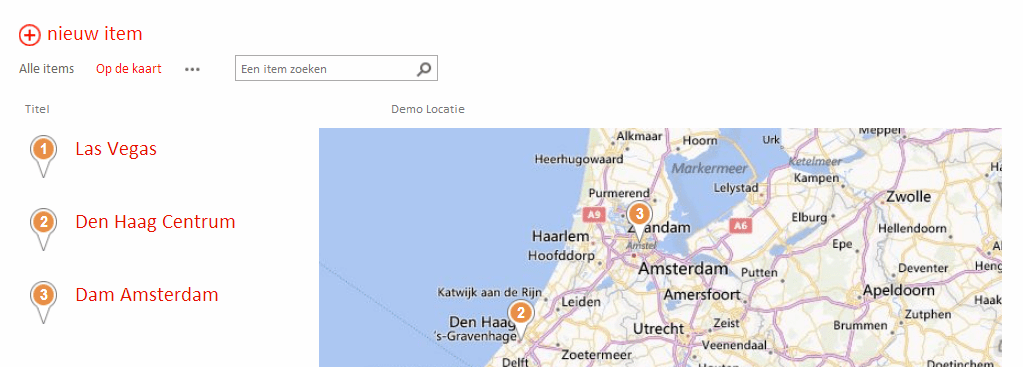
And it is a standard SharePoint metadata field. But wait…..
Where is it? There is a metadata field called “Location”, but this isn’t the one. Where the hack is this elusive field? Well…….it’s not there by default. You will need to add this using Powershell. And in this case, I will add it to my Office 365 (SharePoint Online) SharePoint site.
First things first. I will need to have the right tools to connect to my SharePoint Online tenant. Fortunalty, Microsoft has a very short instruction for this. Just follow these steps:
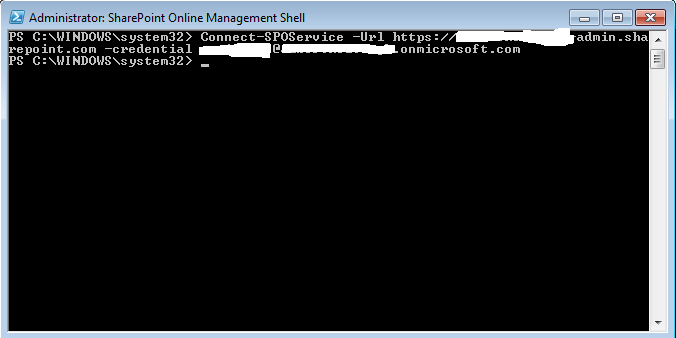
Ok. Now start the SharePoint Online Management Shell as an administrator! This is important. Don’t forget this. Now the second stage of our exercise. I will connect to my tenant.
Just use the following command (and replace yourtenant (etc) with your tenant, duh….):
Connect-SPOService -Url https://yourtenant-admin.sharepoint.com -credential youradmin@yourtenant.onmicrosoft.com
If correct, you will not get an error message 🙂
Ok. Now we can add the geolocation field to the SharePoint site. You will need this code for this.
$WebUrl = ‘https://yourtenant.sharepoint.com/sites/yoursite‘
$EmailAddress = “youradmin@yourtenant.onmicrosoft.com”
$Context = New-Object Microsoft.SharePoint.Client.ClientContext($WebUrl)
$Credentials = Get-Credential -UserName $EmailAddress -Message “Please enter your Office 365 Password”
$Context.Credentials = New-Object Microsoft.SharePoint.Client.SharePointOnlineCredentials($EmailAddress,$Credentials.Password)
$List = $Context.Web.Lists.GetByTitle(“yourlist“)
$FieldXml = “<Field Type=’Geolocation’ DisplayName=’Demo locatie‘/>”
$Option=[Microsoft.SharePoint.Client.AddFieldOptions]::AddFieldToDefaultView
$List.Fields.AddFieldAsXml($fieldxml,$true,$option)
$Context.Load($list)
$Context.ExecuteQuery()
$Context.Dispose()
Thanx to several smart-people for supplying this code-snippet.
Now, the geolocation field is added to the list and you can create the geolocation view.
Now. The Bing Maps Key. In SharePoint Online, you should not be prompted with the “Invalid credentials” notification. However, I did get this message – as you can see in the figures. But this might be because I use a very small scale MSDN Office 365 tenant.
In SharePoint 2013 on-premise scenario’s, you will need to generate a Bing Maps key (just follow the instructions) and then add this key to your SharePoint environment using Powershell (set-spbingmapskey). But…..SharePoint Online doesn’t recognize this 🙂
So I really guess that this is due to the limitations of my tenant. Anyway: try this. It is really nice!
Oh, by the way: in the on-premise scenario you will need:
- SQL Server System CLR Types package (on each SharePoint web front-end);
- The Bing Maps Key: http://bingmapsportal.com/
For the Bing web key use this blog: http://dannyjessee.com/blog/index.php/2013/05/set-the-bing-maps-api-key-in-office-365-using-csom-to-leverage-sharepoint-2013-geolocation-features/
Thanx. I should have been more specific. I didn’t find any option to do this using the management shell 🙂
After you get the Bing Maps Key, you can do it with the SharePoint Online Management Shell with the following script :
Connect-SPOService -Url https://mytenant-admin.sharepoint.com -credential user@mytenant.onmicrosoft.com
$WebUrl = ‘https://mytenant.sharepoint.com/sites/myteamsite’
$EmailAddress = ‘user@mytenant.onmicrosoft.com’
$Context = New-Object Microsoft.SharePoint.Client.ClientContext($WebUrl)
$Credentials = Get-Credential -UserName $EmailAddress -Message ‘Please enter your Office 365 Password’
$Context.Credentials = New-Object Microsoft.SharePoint.Client.SharePointOnlineCredentials($EmailAddress,$Credentials.Password)
$Web = $Context.Web
$Web.AllProperties[‘BING_MAPS_KEY’] = ‘–PUT YOUR BING MAPS KEY HERE–‘
$Web.Update()
$Context.Load($Web)
$Context.ExecuteQuery()
$Context.Dispose()
Cheers !