As we all know, SharePoint offers a recycle bin on the site-collection level. You can configure this recycle bin on the web application level. The recycle bin stores all items which have been deleted by an user. In a more secure environment you will have a first stage and second stage recycle bin. The user can (normally) access the first stage bin using the All site content option. Shown are the items which have been deleted. The user can only access this bin.
When a user deletes something from this recycle bin or when it is automatically cleaned (using the web application settings), the item is moved to the second stage recycle bin. The site collection administrator can access this bin. This bin is accessed using the Site Settings menu. When accessed, the site collection administrator has two views.
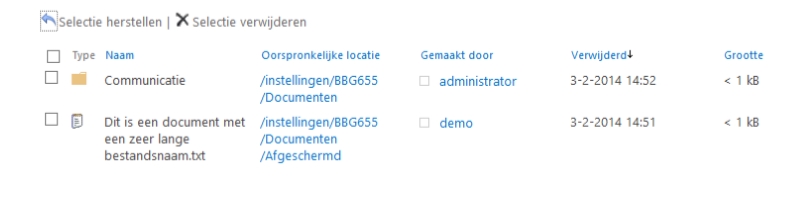
View 1: All first stage recycled material. This shows all the items from the individual recycle bins.
View 2: All second stage recycled material. This shows all the items which have been deleted from the individual recycle bins.

As site collection administrator, you can restore all these items.
Some nice features:
1. When the site collection administrator restores an item (from either stage bins) , the entire path is restored. Even if this path does no longer exists. So if you restore the document “Demo.docx” to “folder Y”, but this folder has been renamed “folder X”, then SharePoint will recreate “Folder Y” and put the “Demo.docx” in it.
2. This won’t work for the user. If the user want to restore something to a location which is missing, SharePoint will simply display an error. And the user will call the helpdesk.
3. When a subsite is deleted, it will skip the first stage bin. So if a site collection administrator wants to restore a subsite, it will be found in the second view.
4. If you have a really large list of items in the bin, use the column names to sort. For example by deletion date or user which deleted the item.