More and more enterprises are starting to adopt the use of sensitivity labels for detecting, classifying and protecting their more (or most) sensitive information. Either because of regulatory compliance needs or just common sense, I notice an uptake in the use of Microsoft Information Protection. Now that the functionality is even part of Office 365 E3 (manual labeling that is) and the client is incorporated into Office Pro Plus, there seems to be little standing in the way for organisations to start using it. In this article I want to provide some tips based on my experiences. This is not, however, a complete how-to guide. Please refer to this article: How-to instructions for Azure Information Protection common scenarios | Microsoft Docs
A taxonomy is a start – but know your information
A classification taxonomy is a good place to start when we want to use Microsoft Information Protection. Many organisations already developed such a taxonomy. In most cases a model like this is used:
- Personal
- Public
- Confidential
- Highly confidential
- Secret

Some organisations go beyond this. NATO for example uses three main categories (non-classified, unclassified and classified). The classified category consists of these levels:
- NATO Restricted
- NATO Confidential
- NATO Secret
- Cosmic Top Secret
I love that last one 🙂
Based on a classification model we can determine the required permissions and other (protection) measures for the information. But here’s the snag. Make sure you understand how this classification is mapped to the information you create, use and share within you organisation. For example; What is deemed to be “highly confidential” or even “secret”?
Most of the time this is based on the potential harm (monetary, reputation, and more) unauthorized access or data loss might inflict on the organisation. But can we assume that everyone in the organisation can make that determination when working with documents? Especially when our users are not accustomed to working with classifications.
This is very, very important. Without an understanding of your information in general, it makes no sense to start using these kinds of labels. You might end-up in a situation where all information has been labeled “general” or “unclassified”. Know your information so that you are able to classify this properly. And while your are getting to know your information, why not include information retention as-well 🤣
Awareness
This one is directly related to the previous. Just setting up a classification taxonomy will not work. You will need to involve and educate your people about the reasons for the classification. And they will need to know how this labeling works. But more importantly, classification of information should become common-place. People should know what information is regarded as confidential and when to apply which label (assuming we’re talking about manual classification). Involve your external parties as-well. They might be seeing the classification as well (either on documents, e-mail or containers). By the way – this goes beyond the Microsoft Information Protection functionality and needs to be a standard part of your operating procedures.
Scenario’s
Another tip which is directly related to the use of labels; Make sure you know how information is used within the organisation and shared internally and externally. Let’s say you have information which is highly confidential. In most cases this type of information is only available for a subset of users in your organisation. Which might indicate that you can encrypt this information using this set of permissions. But what if you still need to collaborate on this information with an external party or share this information with another external party?
Another example: what if you collaborate closely with partners and have access to their environments. Your people work with documents in these environments and when a label is applied, this will be saved with the document (in a nutshell) and therefor the customer’s environment. Do you need to explain this to the partner or do you need other alternatives?
You will need to plan in advance and make sure these scenarios are covered. For example – inform you partner that labeling is mandatory within your organisation and this includes any documents created or modified using your organisation’s credentials.
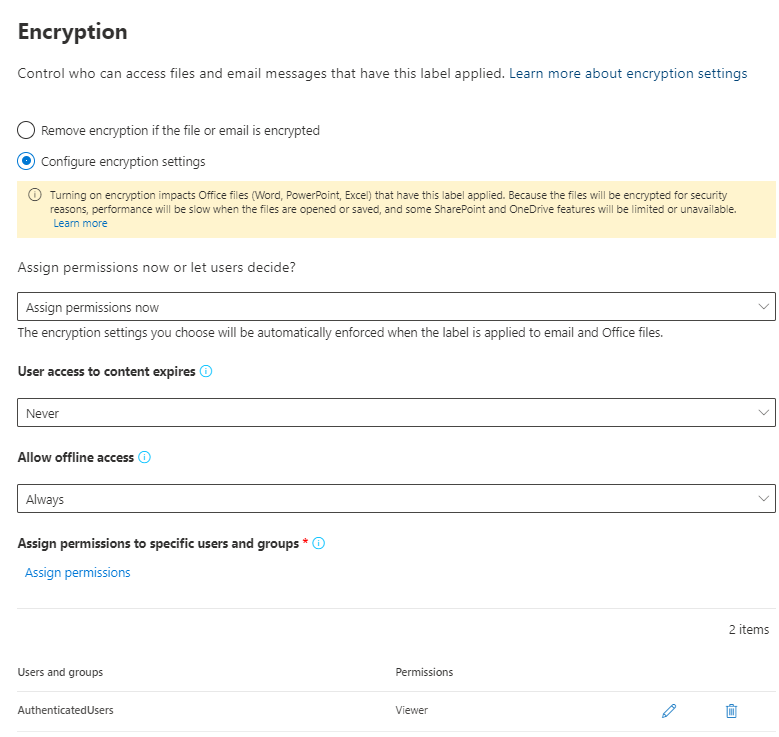
Or support B2B collaboration scenarios by using the “All authenticated users” setting in the label’s protection configuration. This allows guest-users (Azure B2B) to access protected information (as described here).
Get management involved
As with any (new) functionality – make sure you have the backing of your management. This goes beyond the mandatory “you need to do this because of GDPR” (or another such reason). Management needs to set the right example. Allow yourself to be invited to team-meetings and make sure management introduces the concept of information classification. On another level – make sure that your management (or at least CISO and CTO) know the implications of using labeling and especially encryption.
Classification and/or protect?
Microsoft Information Protection is used to detect, classify, protect and monitor the use of (sensitive) information in Office 365 and beyond. Some organisations seem to think that labeling only makes sense when you add additional functionality like visual markings or protection (encryption). Or, in other words, every label needs to be configured to protect documents.
As stated earlier in the scenarios part: be careful. This train of thought can lead to unexpected consequences. Information cannot be opened by your partners, your own people are not able to access certain information because the configuration was not 100% correct, and more. But more importantly: classification and protection do not have to be linked!
Using classification itself is hard enough. It will allow your organisation’s information management to mature. You will get an insight into how people work with the classification and where the most sensitive of information is stored. You can use data loss prevention to stop information from being shared.
Because a document has been classified (labeled) does not imply that it also needs encryption. Sometimes it’s not feasible to use protection because it will have negative side-effects.
Which isn’t implying that you shouldn’t think of protection from the start. You should and if you are able to identity the most sensitive of information and know the requirements to protect this: then do it. Don’t wait. But don’t try to fit all your information protection in one solution at once.
Some personal notes on protection:
- Be careful with the personal encryption settings. At first, stick with the pre-defined and label specific ones;
- Note that the Azure key used for encryption is linked to your tenant. Beware of tenant-tenant migrations or off-boarding scenario’s;
- Make sure that you always include more than one user in a label configuration – that is: make sure the information can always be opened by someone else;
- Be aware that at this moment the encryption of documents in Microsoft 365 has two side-effects: auto-save will be disabled and co-authoring is disabled. See the public preview for more information on solving this;
- A label (with or without protection) does not alter the visual aspects of a document. So please try to avoid things like “Merge acquisition Google – we are all agreed.docx”
Know your scope – e-mails
Most information in this article revolves around documents. Your information protection strategy will need to includes all locations where sensitive information can be stored and shared in documents. This goes beyond Office 365 or your file-shares. Think about non-Microsoft cloud environments as-well.
And while you are thinking about locations: think about e-mail as-well. Do you want to extend your labels to include e-mail messages and attachments? Or do you reply on the more basic settings of “do not forward” and “encrypt only?
Be aware that there is a difference. When an e-mail is labeled and protected, this protection will effect the recipient of the message. Has this recipient been included in the label (for example, by using the email domain or “All authenticated users”), then the message can be opened with an RMS enlightened app like Outlook. If not: then the recipient will not be able to open the message. Be careful!

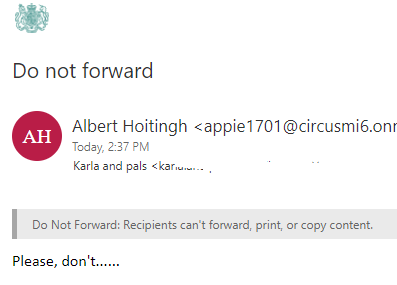
The other options like “do not forward” or “encrypt only” make use of Office 365 Message Encryption. The big difference here is that an e-mail with “do not forward” can be opened by the recipient regardless of client or settings!
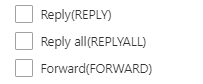
If you want to use labels and e-mail, why not create a specific e-mail label for this, as a label can be configured with e-mail related permissions.
Know your scope – containers
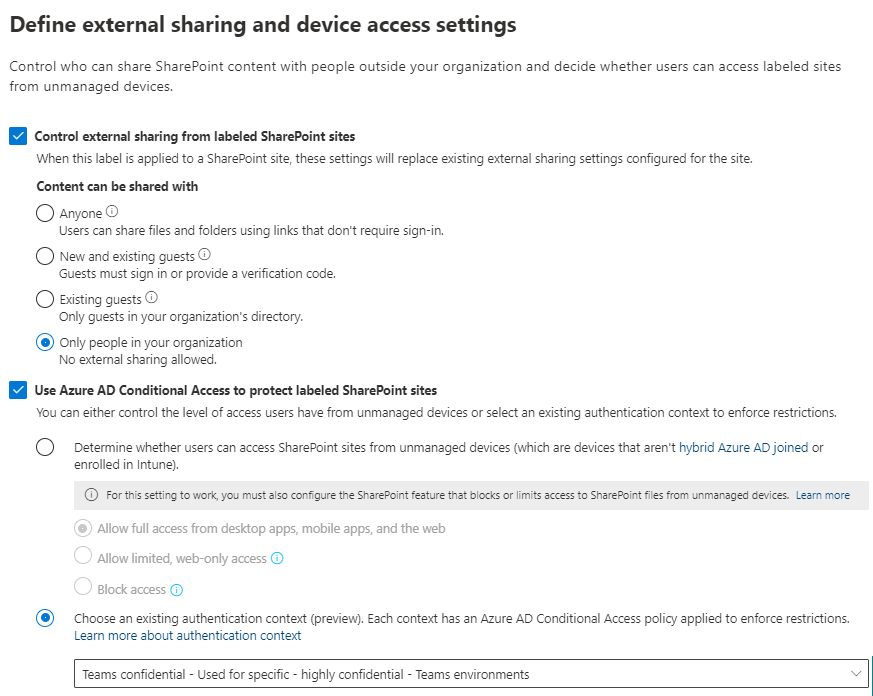
Container based labeling was introduced some time ago. Including this functionality in your solution offers many advantages. You can set the level of external sharing and have conditional access policies applied. You can set-up different labels strictly used for container based classification. But you might want to consider using your document/email based labels for this as well.
For example: let’s say you’re using the “Confidential\Internal use only” label. This protects the contents of documents and emails by restricting access for external parties. This might be a great label for internal projects as-well. Enhance the label to include SharePoint Online sites and Microsoft Teams environments. Now you can set the access for external sharing and external access to none. And then apply this to your internal Teams-projects. Unfortunately you still cannot set this label as the default for documents in the team though…..
Clients
In order to use Microsoft Information Protection for documents and/or e-mails, we will need clients. Forget about the Azure Information Protection client (versie 1.x) as this has been deprecated. We need to look at the unified labeling client and the Office integrated client. As the latter is part of Office, this might be the most easy way to start using your labels. But there are some scenario’s which will require the installation of the unified labeling client.
One such scenario is to use Windows Explorer to label multiple documents at the same time. Another scenario is labeling of PDF-documents.
So it’s required that you know and understand the difference between these clients. The integrated client will not provide the functions below that are included in the unified labeling client:
User-related (what you can see)
- Label inheritance from email attachments
- Information Protection bar in Office apps
- Windows Explorer integration
- PPDF support for applying labels
- Display “do not forward” in Outlook
Platform related (what you mostly don’t see)
- Scanner for on-premises data stores
- Custom permissions set independently from a label
- PowerShell labeling cmdlets
- Manual policy file management for disconnected computers
- HYOK support
- Usage logging in event viewer
- Track/revoke protected documents
- Protection-only mode
- AD RMS support
- Microsoft 97-2003 format support
- Double Key Encryption
In closing
I hope this article makes sense. I wanted to share some basic thoughts on Microsoft Information Protection. There are more (of course), so stay tuned. If you have any questions or remarks, don’t hesitate to post them. These are my thoughts and perhaps you have a different view.
I am curious what best practices are for creating custom SITs with multiple patterns. For example lets say I have a custom SIT with 12 or so patterns using Regex. Is there an easy way to identify which pattern was a hit when looking through content explorer or an auto-label simulation?
Hi Dan,
That’s a very good question. I don’t think so. When testing an SIT you get either a match or no-match and no additional information. If you have some supporting elements in your pattern then these will show up in the test as well. And that might give you an indication of the match. But the test (or content explorer or simulation) doesn’t provide much more info. The simulation mode for information protection does provide a metadata view for the documents/emails found. But this also does not go further than the sensitive information type or label detected. For example, this is from a PDF discovered by auto-labeling;
sensitiveInfoTypes:[{“name”:”International Banking Account Number (IBAN)”,”id”:”e7dc4711-11b7-4cb0-b88b-2c394a771f0e”,”low”:1,”medium”:1,”high”:1},{“name”:”Slovenia Tax Identification Number”,”id”:”e47b071e-c352-4d70-8241-8c215ad65505″,”low”:1,”medium”:null,”high”:null},{“name”:”Patientnummer”,”id”:”aed3fcf4-0e26-41d2-b8dd-47ab882af5fe”,”low”:1,”medium”:1,”high”:1},{“name”:”Medische gegevens ICD-9 en ICD-10 codes”,”id”:”e92ee2dc-30b5-46b7-8353-c760a7b9d821″,”low”:6,”medium”:6,”high”:6},{“name”:”Patient privacy gevoelige gegevens”,”id”:”b1e98ee7-faa6-4653-a054-cf48595339fa”,”low”:1,”medium”:1,”high”:1},{“name”:”All Full Names”,”id”:”50b8b56b-4ef8-44c2-a924-03374f5831ce”,”low”:2,”medium”:2,”high”:null},{“name”:”Netherlands Physical Addresses”,”id”:”b3650e47-f2dc-4d29-a4fc-1b9154005c07″,”low”:3,”medium”:3,”high”:3},{“name”:”All Physical Addresses”,”id”:”8548332d-6d71-41f8-97db-cc3b5fa544e6″,”low”:3,”medium”:3,”high”:3}]
I might be mistaken, but I do think this is not possible at this time.
Now that u explain it a Lil better I could have let a lot of peoples personal date out,I really didn’t know what I was doing and have but was determined to know the truth about some things