Reading time: 5 minutes

Provide more feedback to your users when sending confidential information.
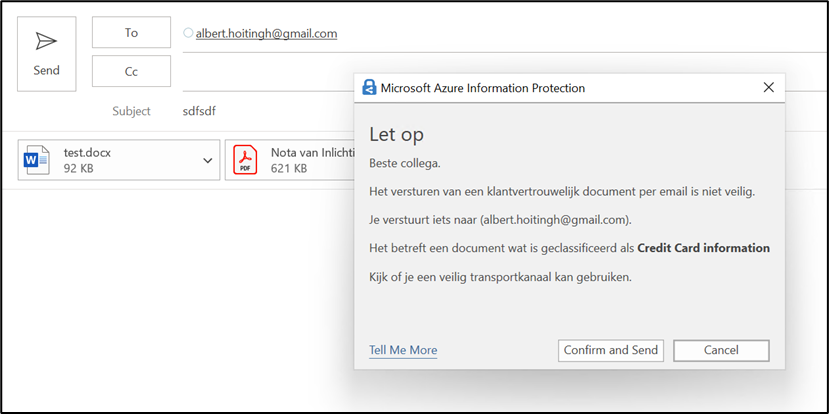
In some earlier iterations of Microsoft Purview Information Protection (namely, Azure Information Protection), we were able to set specific advanced configurations. These configurations worked with the unified labeling client integrated in Microsoft Outlook and allowed you to set specific pop-up messages. For example:
For this to work, you needed to have a specific .JSON file with the text you needed and configure this using Powershell. For example:
$filedata = Get-Content “policyfile.json”
Set-LabelPolicy -Identity “Policyname” -AdvancedSettings @{OutlookCollaborationRule =“$filedata”}
Most of these settings, including the one above, do not apply anymore when you are using the built-in client or the new Purview Information Protection client. But we can recreate this by using Microsoft Purview Data Loss Prevention rules. In this article, I will go through the steps for this. And also, the new function of checking for sensitivity before sending the email.
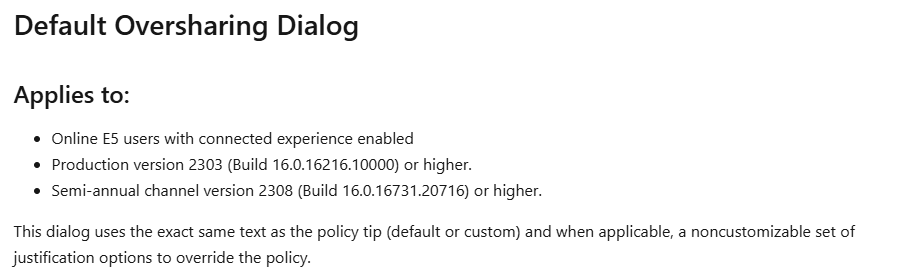
First off; Do note the prerequisites for this. As described here: https://learn.microsoft.com/en-us/purview/dlp-ol365-win32-policy-tips#customized-oversharing-dialog
Purview DLP
In order to have a specific pop-up notification shown when someone sends an email with a sensitive document, we need to look at DLP policies and DLP rules for Exchange Online. It is here that we can set up the pop-up.
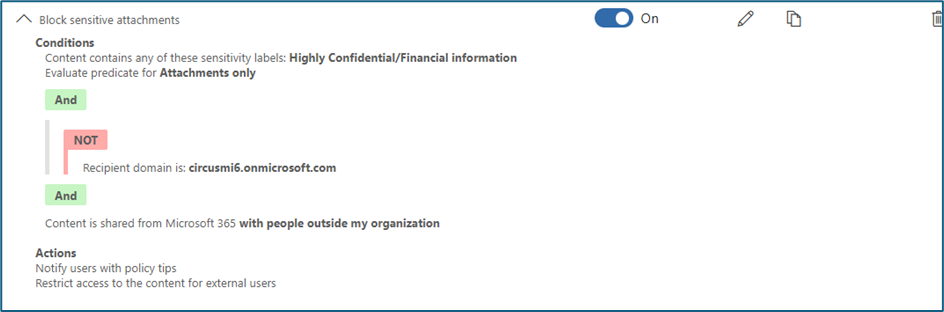
In my example, I want to notify people when sending an email with an attached document that has been labeled as “Highly Confidential/Financial Information”. As I only want to check for outgoing emails, I exclude my (demo-tenant) domain.
I will skip the settings for the conditions (you can see them above), but focus on the Policy tips section. Microsoft released a new option in this section not that long ago. And for the Outlook app to show you the notifications, you need to set it up like this.

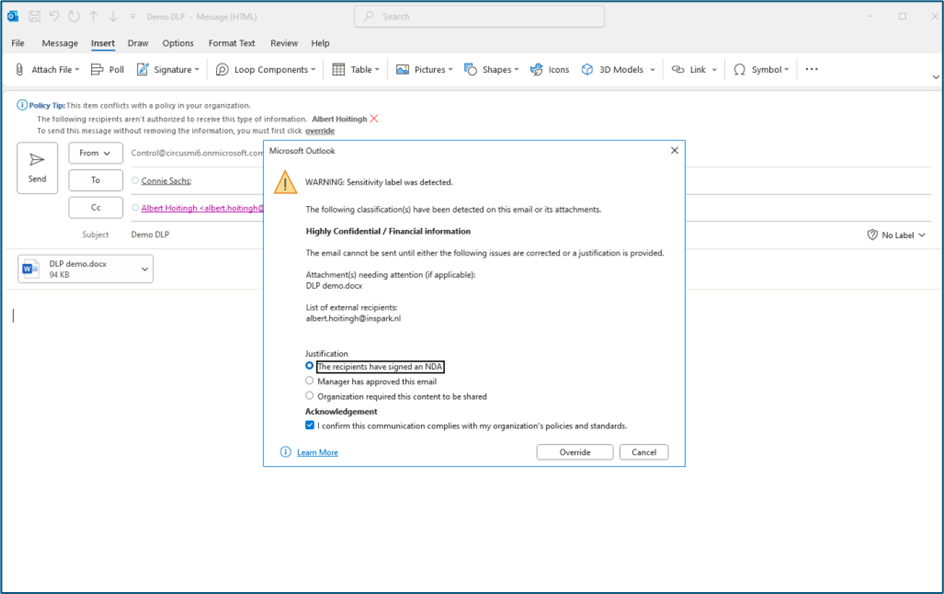
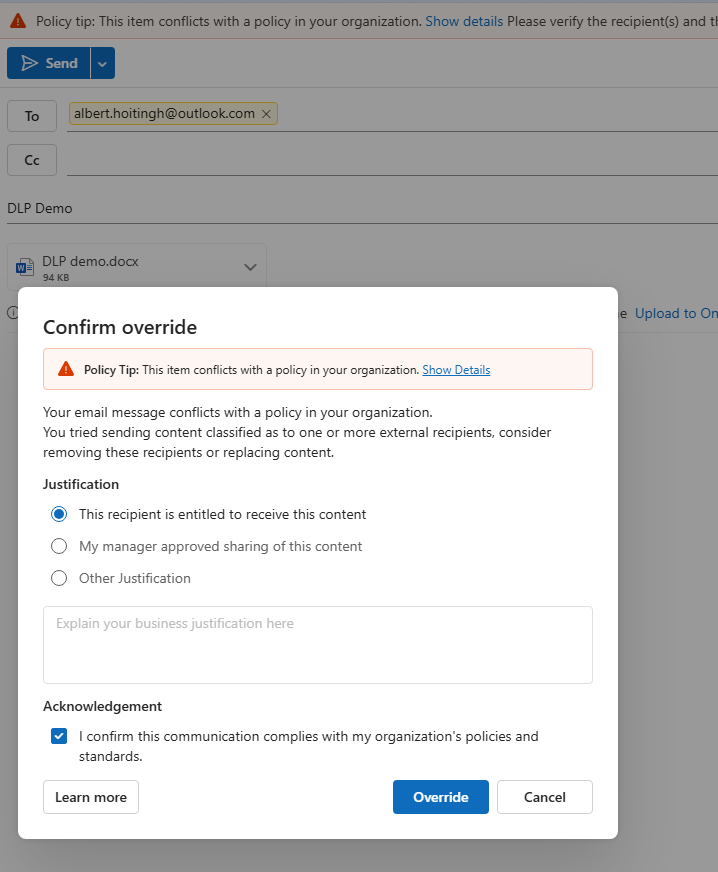
If you do not upload a specific JSON file, you will see the default options in this oversharing dialog. But in my case, I wanted to customize this interface to show the external recipients and the sensitive information. I also wanted the user to acknowledge the override and you will see this in action below.
For this to work, you will need that JSON file. And it looks like this. Yes, this is the same as the example that Microsoft uses 😉
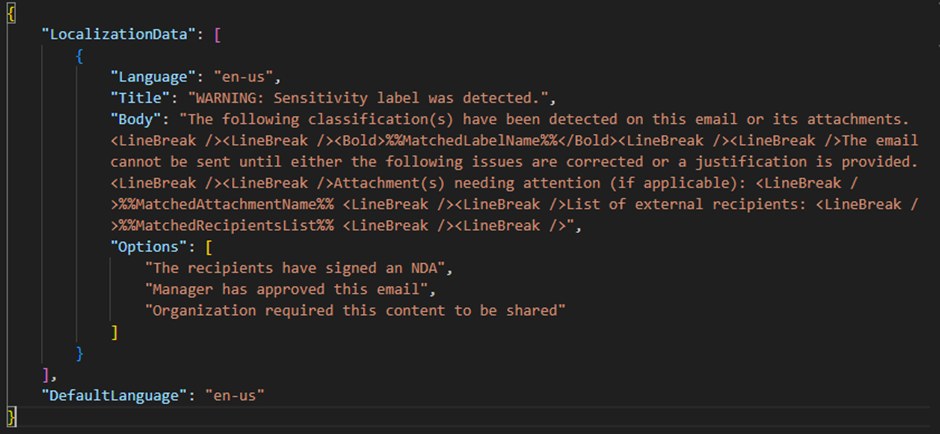
Pretty easy and you can work with multiple languages. When you upload the JSON file (which is also possible using PowerShell), a check is performed on the file. In PowerShell, this is done directly. But in the Purview portal, you will see the results (if negative) at the end of the wizard for the DLP rule. Which is somewhat of a hassle. But in the end, it will work.
Try it out!
So, let’s see how this works. I will try to send an email with a labeled Word document using the (classic!!) Outlook app. Yes, the classic one. See below for the new one…. And presto: the new DLP rule comes into effect. Note: I did set this DLP rule to check for attachments only. When you set it to check both emails and attachments or emails only, the email will be subject to a check for the sensitivity label.
I did mention that this is the “classic” Outlook app? This function works great in this version. However, the new Outlook app does not want to work entirely correctly. Below is the standard oversharing policy tip, but it was not able to detect which label was used: “Content classified as……”. It is left blank. And the custom (JSON) pop-up did not work at all. But this will probably be fixed soon.
Want to make sure….
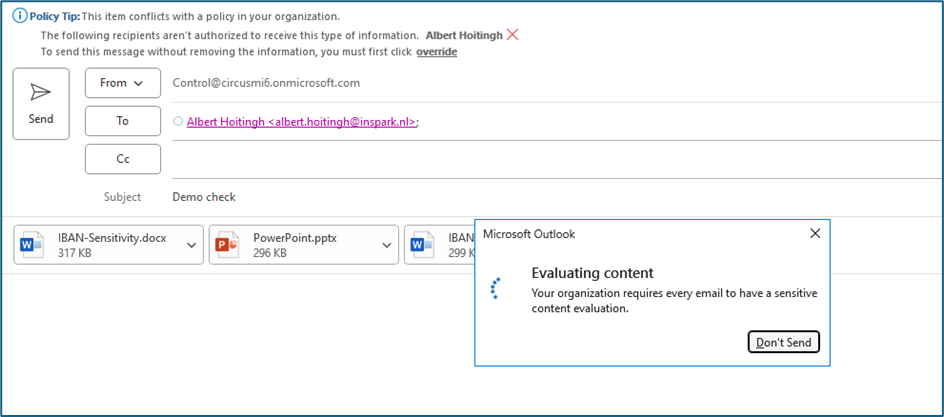
The evaluation of the sensitive content is normally very quick, but it can take some time. And in the meantime, your users might just be able to send out the email(s) anyway. But now there is a simple solution for this. You can configure a specific Office setting to evaluate the content before it is sent. See below.
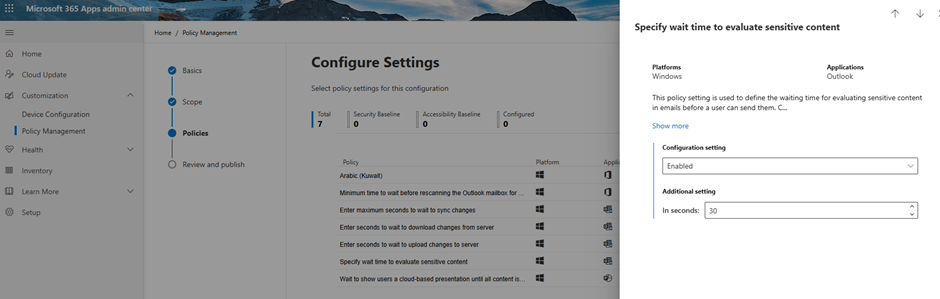
This setting is managed by a RegEx value. You can use Group Policies to set this. But in my environment I used the https://config.office.com portal to enable the setting: Specify wait time to evaluate sensitive content.
That’s it
There are more scenarios that you can enable when working with this setting. I believe the “scan before send” option can be very powerful. I still believe that the Data Loss Prevention functions in Microsoft Purview are becoming more powerful and relevant every day.

Thanks for the write-up. I’m trying to replicate this same policy but getting stuck identify the label. Did you create the “Highly Confidential/Financial Information” label yourself? If so, can you share that info? Appreciate it.
Hi there,
Yes – the label in the article was created by me. The rule detects the label and shows the notification. But in my experience, this only works (for now) in the old Outlook client. The new one did not work for me. The label itself is a common sensitivity label for both files and emails.
Thanks. I can’t get the confirm override pop-up. I see the evaluating content appear and then disappear in a few seconds. Also, do you have a copy of the json that you can share?
Hi there!
This is the JSON I used:
{ “LocalizationData”: [ { “Language”: “en-us”, “Title”: “WARNING: Sensitivity label was detected.”, “Body”: “The following classification(s) have been detected on this email or its attachments. %%MatchedLabelName%%The email cannot be sent until either the following issues are corrected or a justification is provided. Attachment(s) needing attention (if applicable): %%MatchedAttachmentName%% List of external recipients: %%MatchedRecipientsList%% “, “Options”: [ “The recipients have signed an NDA”, “Manager has approved this email”, “Organization required this content to be shared” ] } ], “DefaultLanguage”: “en-us” }
For the rest, the DLP policy is standard.
Detect when information is shared from Microsoft 365, and also: Recipient domain is not
I added the latter just to be sure.