Reading time: 3 minutes

A bit more on advanced settings for sensitivity labels
In the previous post, I wrote about some of the (advanced) settings we can apply to sensitivity labels and the accompanying policies. In this post, I want to focus on some more settings which might be helpful.
Setting a default sublabel
I am a big proponent of using a layered hierarchy of labels. Using top-level and sub-labels makes the solution more scalable. However, the top-level labels are more easily selected from the user interface, but this is no longer possible when you have sublabels. So, did you know that you can set a specific sub-label as the default when the top-level label is selected? In fact, returning the option to select a top-level?
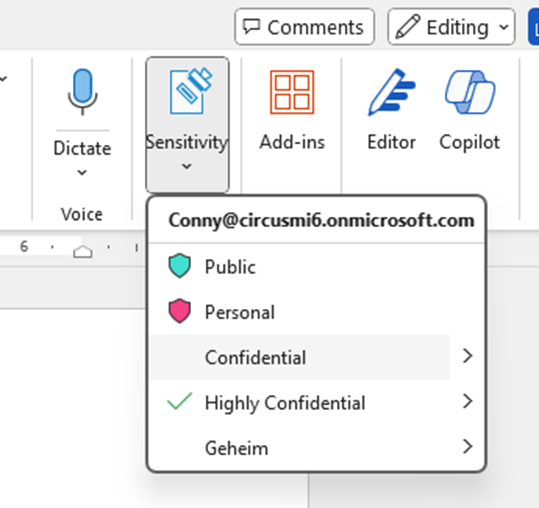
This is how it works in Word.
In this example, I chose the top-level label “Confidential” and the sub-label “All employees” gets selected. Very nice! You can set this on the sensitivity label by using this cmdlet.
Set-Label -Identity “top-level label-id” -AdvancedSettings @{DefaultSubLabelId=”Sub-label-id”}
One snag – it does work in the Microsoft 365 App, but it did not seem to work in Office Online.
Setting a specific color
Yes, you can set the color for a top-level label from the admin portal. But what if you want to add your own coloring scheme? Well, you can. The label “Personal” has been changed as in the example below.
This is easy to do as well. You just need the HEX value of the color you need. And this is the PowerShell cmdlet required:
Set-Label -Identity “Top-level label-id” -AdvancedSettings @{color=”#f54287″}
Disallow content analysis (Copilot)
This function is relatively new and has been added by Microsoft to provide some form of additional protection when using Microsoft 365 Copilot. It prevents the content in Microsoft 365 Apps (so Word, Excel, PowerPoint, and Outlook) from being sent to the content analysis services. By doing so, Copilot will not be able to process the information. But not just Copilot. This setting also stops other functions from working: data loss prevention policy tips, automatic and recommended labeling. So do use caution with this setting. This is the cmdlet:
Set-Label -Identity “label-id” -AdvancedSettings @{BlockContentAnalysisServices=”True”}
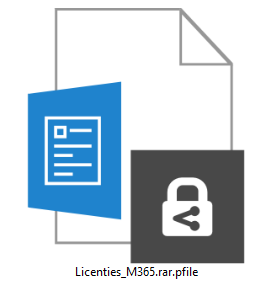
Containers support
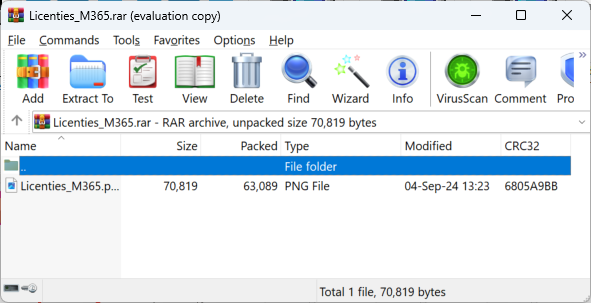
This setting has nothing to do with labels on groups or site level. Let’s say you have a situation where someone has labeled and encrypted some files in these formats: pst, zip, 7zip and rar. After encryption, the file format for these files will change to “pfile”. And the native client will not be able to open these files.
Natively, the Microsoft Purview Information Protection Viewer client will be able to open an encrypted zip file. But for these other (and only these other) file formats, you need to set a specific setting. This is the cmdlet:
Set-LabelPolicy -Identity “label policy” -AdvancedSettings @{EnableContainerSupport=”True”}
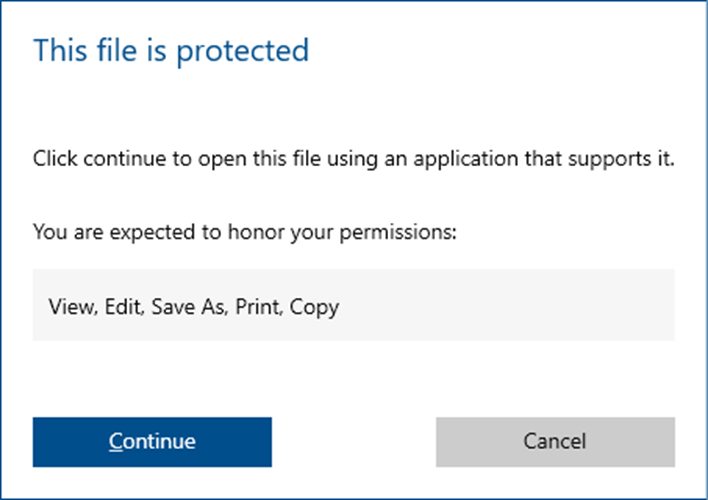
After this, you can simply open the file using the viewer-client, click Continue, and the viewer will open the relevant application. In this example, Winrar. When opening an encrypted zip file, Windows Explorer will open the file for you.

Want to know more?
If you want to know more, please go to this Microsoft Learn pages:

One comment